How to use WSCCT tool?
- Case Study
- Setting the Test Environment
- Preparation of the specification
- Design of the Timed Automata
- Simulation and verification of the specification
- Modification of the specification
- Convention
- Creation of the test environment
- Creation of simple simulated partner services and connecting them to the SUT
- Creation of Tester’s Queue
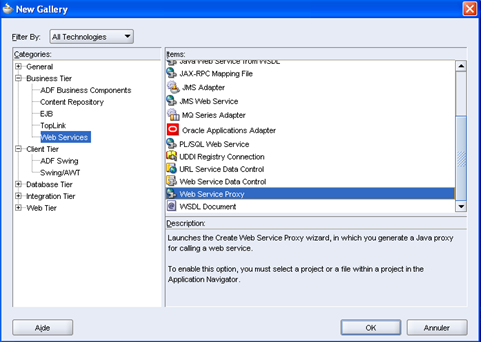
- Creation of proxy of tester’s Queue
- Creation of partner service’s Queue
- Creation of the proxy of partner service’s Queue
- Modifying the code of partner service
- Creation of BPEL invoker
- Creation of classes that call the created proxies
- Use of WSCCT Tool
- Case Study
- Setting the Test Environment Before starting the test of BPEL composition, you must go through the following steps:
- Preparation of the specification
- Design of the Timed Automata The WSCCT tool user has to design the timed automata using UPPAAL; you can see the tutorial available on UPPAAL website.
- Simulation and verification of the specification We use UPPAAL to simulate and verify the correctness of the specification.
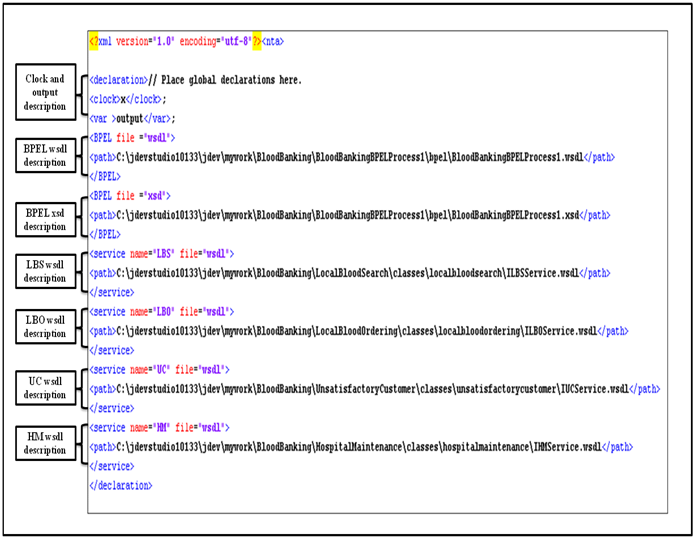
- Modification of the specification 1- Let’s take the xml file generated by UPPAAL. You can download it from this link. This description is composed of 3 parts:
- Convention We will make an agreement for all the specifications that you create. - “invokedWebService” contains the name of the current invoked partner service. - “Output” means the message sent by the current invoked partner service to SUT. - “Template” is the name of template describing the composition of partner service.
- Creation of the test environment
- Creation of simple simulated partner services and connecting them to the SUT Using JDeveloper, create the necessary partner services. In our case study we have got four partner services (LBS, LBO, UC and HM) and the client. We suppose that all message exchanged between the SUT and its partner services are “String”. In order to test the overall operation of the system, we will, firstly, create simple partner that takes a string as input and returns it. Let’s create these simple web services.
- Creation of Tester’s Queue Tester’s queue is used to save the information sent by the BPEL to the current invoked partner service. The WSCCT core gets this information and checks its correctness with reference to the wsdl file of the invoked partner service.
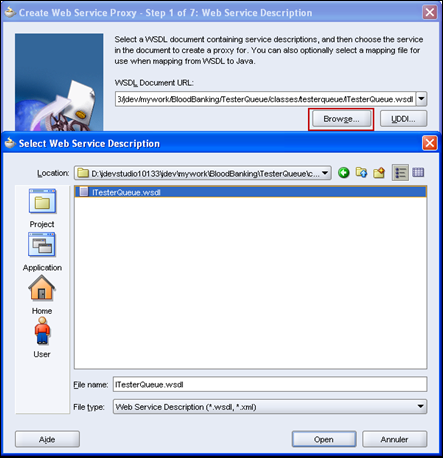
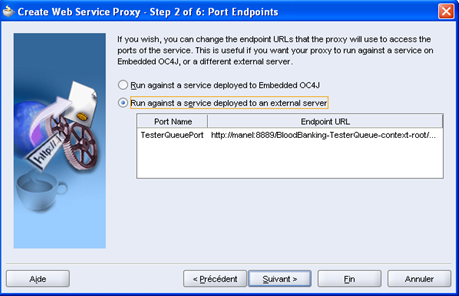
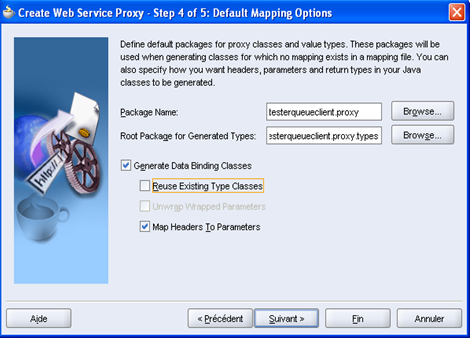
- Creation of proxy of tester’s Queue In order to facilitate the usage of the Web service “TesterQueue” by partner services and WSCCT core, we use proxies. So, how to create a proxy of “TesterQueue”?
- Creation of partner service’s Queue Partner’s queue is used to save information sent by WSCCT core to the current invoked partner service. The current invoked partner service takes this information and sent it to the SUT. Let’s create the queue of LBS service.
- Creation of the proxy of partner service’s Queue In order to facilitate the usage of the Web service “TesterQueue” by partner services and WSCCT core, we use proxies. To create a proxy, follow the same steps taken in creating the proxy TesterQueue in this section.
- Modifying the code of partner service As we have said before, all partner services have the same role. In fact, each one receives a message from SUT and forwards it to the WSCCT core component or it receives a message from the WSCCT core component and sends it to the SUT. We will here modify the code of the Local Blood Search.
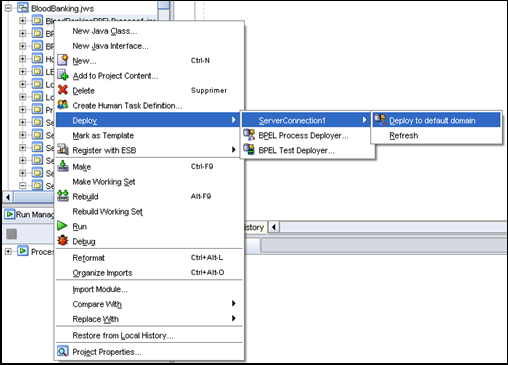
- Creation of BPEL invoker 1- Right click on the “BloodBanking” and create a new Project “Java Application Project”, give the name as “BPELInvoker”, click Next, then Finish. In this project, we will create a “Java Web Service Proxy” to invoke the BPEL.
- Creation of classes that call the created proxies In order to test BPEL compositions, WSCCT core uses some classes to call the proxies of the partner Web services. These classes should be created in the tester directory. So, go to the download section to get the tester directory. In our case study, we have created five proxies and its essential classes are:
- Use of WSCCT Tool In this section, we illustrate how to use our proposed WSCCT tool for conformance testing of the HBO-TP scenario implemented in BPEL. In the Tester directory, right click on “Tester.java” which contains the main class of WSCCT core. Select Run in order to execute the test of our Web service composition.
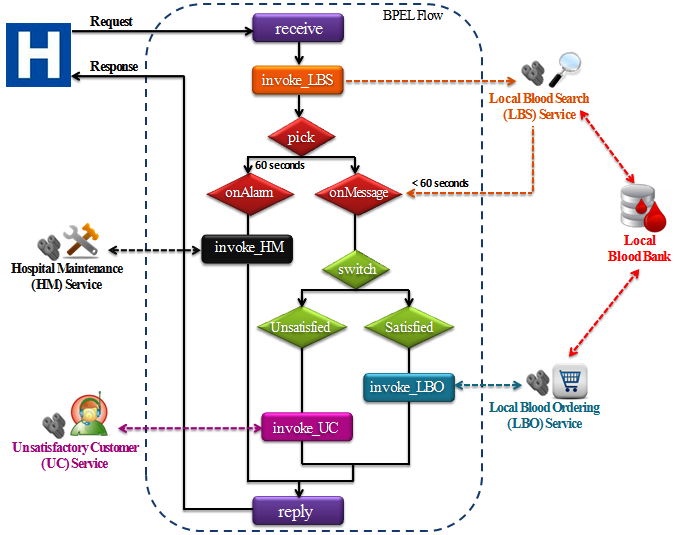
In this section, we illustrate how to use our proposed WSCCT tool for conformance testing of a HBO-TP (Hospital Blood Ordering for Transfusion Purposes) scenario implemented in BPEL.
The transfusion of blood or its components (plasma, platelets, etc.) has an important role in modern medicine and surgery. In this context, we show our approach by means of a case study consisting in a hospital ordering blood components for transfusion purposes. We suppose that the required business process (written in BPEL) composes services of: local blood search (LBS), local blood ordering (LBO), hospital maintenance (HM) and unsatisfactory customer (UC). We also assume that the two first partner services (LBS) and (LBO) are connected to a local blood bank which is situated in the involved hospital. In fact, the blood bank is mainly responsible for rapid response to urgent requests for blood components and for selection of suitable blood component for each clinical condition.
Once a hospital unit (such as emergency, surgery, etc.) sends a request to the HBO-TP process, the (LBS) service is invoked to search for required blood component from the local blood bank. This search is conditioned by a waiting time. Indeed, the process should receive a response from (LBS) within maximum 60 seconds (for example). Otherwise, the process sends a connection problem report to the (HM) service. In case of receiving a blood search response before reaching 60 seconds, obtained search results are analysed. If the conditions related to the needed blood component are satisfied, then the (LBO) service is invoked to order blood from the local blood bank. Otherwise, an unsatisfactory customer report is sent to (UC) service for information about unavailable required blood component. Thus, responsibles are put in charge to answer quickly the hospital unit need for blood. Finally, a detailed reply informing about final results is sent to the concerned hospital unit.
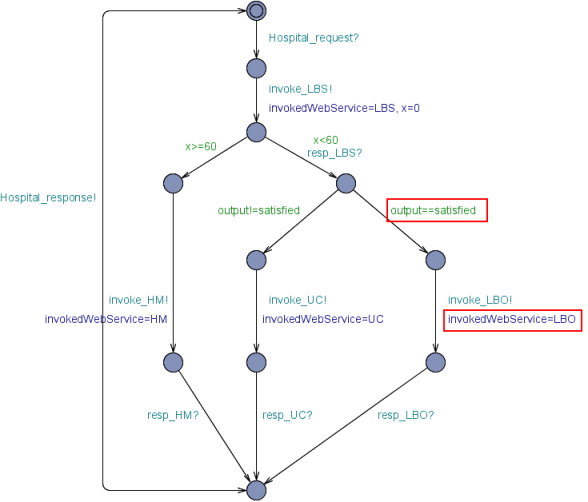
Notice 2: At each invocation of a partner service, you must update the variable “invokedWebService” with the corresponding name of the partner service. This name should be the same than the name used the description of this partner service (we will speak about the description of partner service in the next section).
Notice3: output is a variable that specifies the output of partner service. We use this output in the case of switch activity.
Notice 4: In this specification, after the invocation of the partner service LBS, we have a case of synchronous communication between BPEL and its partner LBS. So we have two possible paths : the first consists in treating the case that the invoked partner service answer at the right time (t inferior than 60 in our case), while the second treats the case of transition timeout).
• Declaration: that contains the declaration of the type of each variable and message in the specification.
• Description templates: which contains the name of the template and the description of locations (or states) and transitions.
Notice: we call the template of BPEL process as “Template”.
- Location: is defined by its name and its identifying (id).
- Transition: is defined by its source, its target and its type.
• Processes: the active processes.
For more information, please consult UPPAAL tutorial.
2- For parsing this xml file using JDOM , you must delete the first comment.

- The clock tag:
In our case study we add
- The declaration of “output”: output;
As has been reported before, output refers to the message sent by the current invoked partner service to the SUT.
- The BPEL description :
* The wsdl file description: we indicate the path of wsdl file the BPEL process:
* The xsd file description: we indicate the path of the xsd file of the BPEL process:
- The partner descriptions: for each partner service, we indicate its name, and the path of its wsdl file:
The next figure shows the declaration of HBO-TP specification after modification.
 Top of Page
-
The test environment is composed of simulated partner services, the queue of each partner service, the queue of tester and the proxy of each queue.
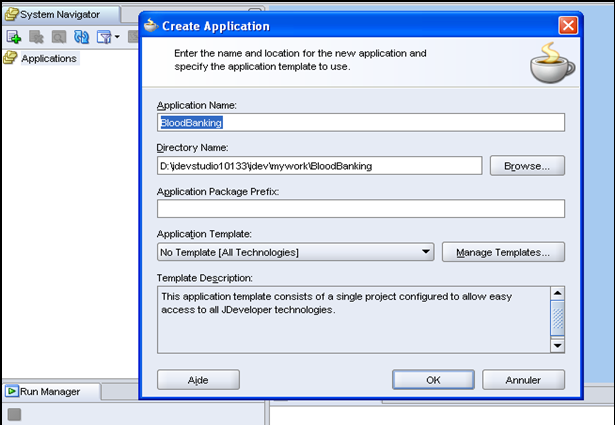
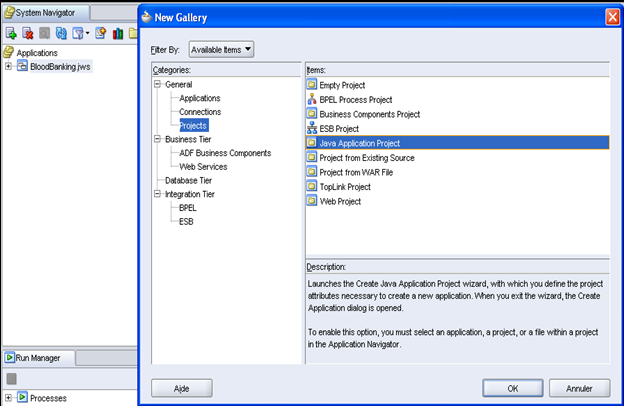
1- Start the Jdev. Right click on Applications, Select New Application give name as“BloodBankingBanking” Select “No Template” as Application Template. Click OK.
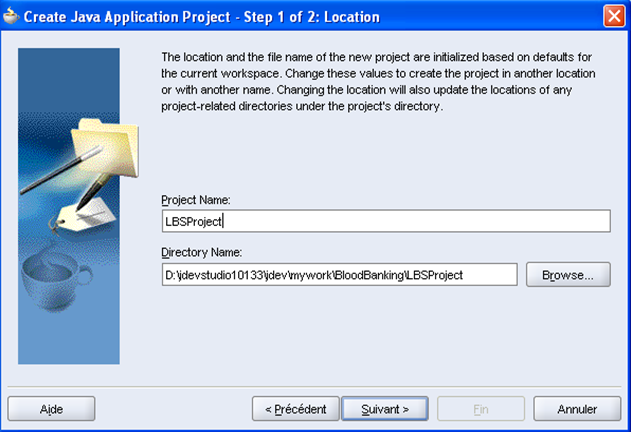
2- Right click on the “BloodBanking” and create a new Project “Java Application Project”, give the name as “LBSProject” click Next , then Finish.
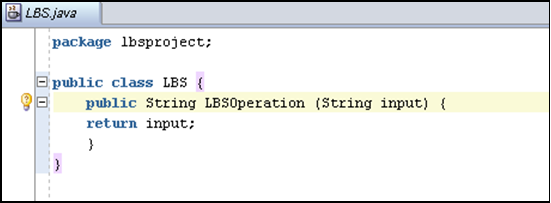
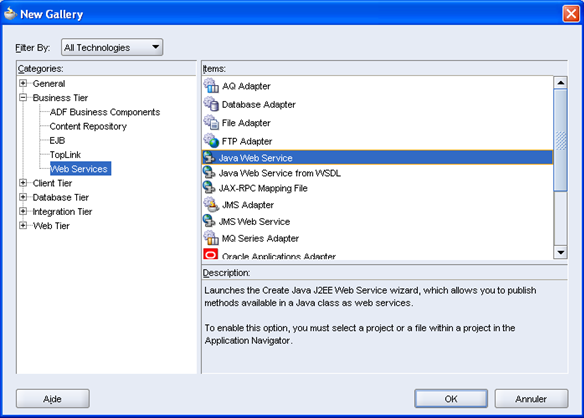
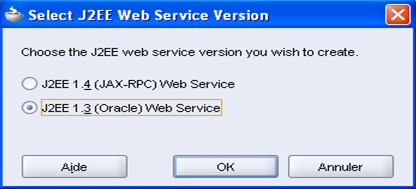
6- Right Click on “LBSProject”, select “All Technologies”, expand “Business Tier”, select “Web Services”, select “Java Web Service” and click OK,
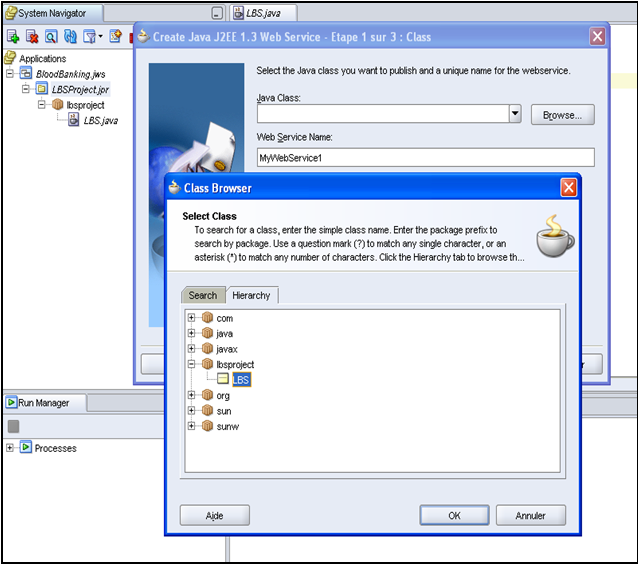
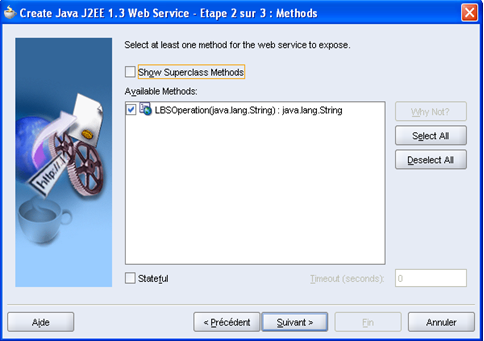
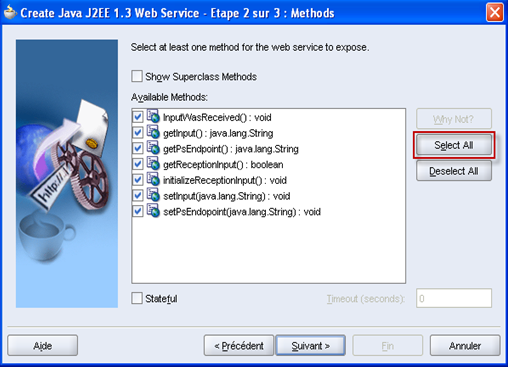
9- Select the methods that you want that the web service expose. In our case, it is LBSOperation(java.lang.String).
11-
Notice: We will make an agreement for all partners that you create:
- The name of the partner service must the same as the specification.
15- Now, add these created partners to your BPEL process, in the correct place.

Before starting the test, we must prepare the queue of the tester and each partner service. Notice: all queues are web services.
Let’s start by the queue of the tester.
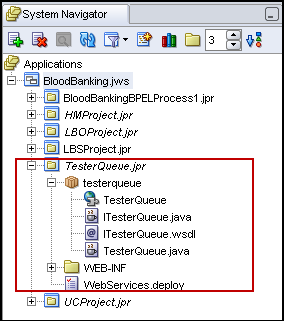
Top of Page1- As we did in the section 2.2.1, create, on the “BloodBanking”, a new Project “Java Application Project”, give the name as “TesterQueue”.
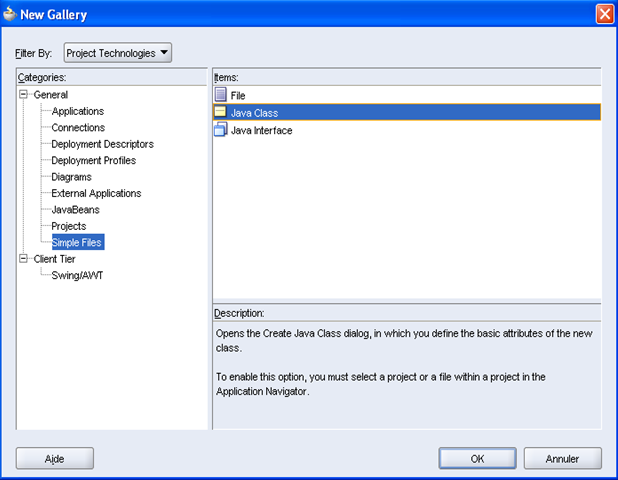
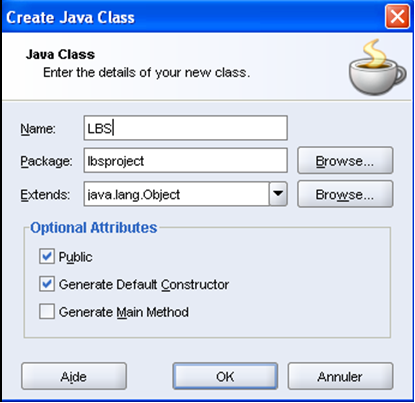
2- Create a new Java Class, give the name as “TesterQueue”.
3- In “TesterQueue. Java”, copy and paste the code existing in this file.
4- Create the corresponding Web service, and give it the name as “TesterQueue”.
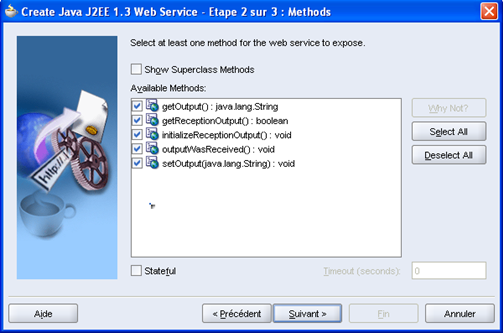
5- Select all the proposed methods as shown in the next figure.
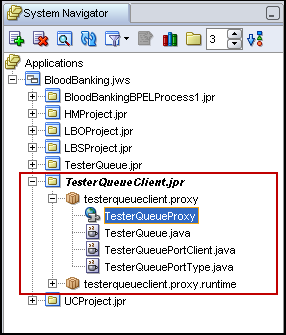
1- Right click on the “BloodBanking” and create a new Project “Java Application Project”, give the name as “TesterQueueClient” click Next, then Finish.

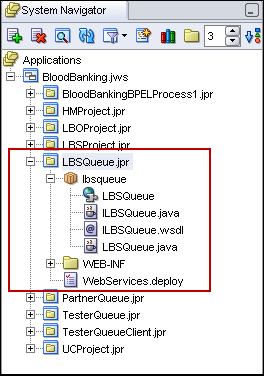
1- As we did in the section 2.2.1, create, on the “BloodBanking”, a new Project “Java Application Project”, give the name as “LBSQueue”.
2- Create a new Java class; give the name as “PartnerQueue”.
3- In “PartnerQueue. Java”, copy and paste the code existing in this file.
4- Change the name of the package: instead of “partnerpackage”, set the name of the package which contains “LBSQueue.java”. In our case, it “lbspackage”.
5- Change the name of the class: instead of “PartnerQueue”, set “LBSQueue”.
Notice: for each creation of a partner service’s queue, we change the word “partner” by the name of the corresponding partner. Modification must be done carefully. You can download LBSQueue code from here.
6- Create the corresponding Web service, and give it the name as “LBSQueue”.
7- Select all the proposed methods as shown in the next figure.
Notice: We will make an agreement for all the Queues of partners that you create.
- Queues are Web service.
- The name of Queue is concatenation of two words the Name of the web service and the word “Queue”. We suppose that your Web service is named A. So it’s Queue have the name “AQueue”.
Notice: We will make an agreement for all the proxy of Queues of partners that you create.
- The name of the proxy is the concatenation of two words the Name of the Queue and the word “Client”. We suppose that your Web service is named A. So its Queue’s proxy have the name “AQueueClient”.
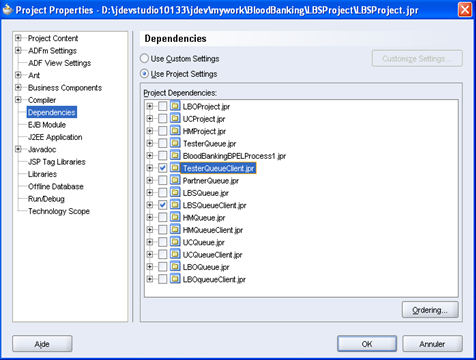
Top of Page1- We want our java jar files created in the “LBSQueueClient” and “TesterQueueClient” to be available at “LBSProject”. For this, right click on “LBSProject”, go to project properties, select dependencies and check on “LBSQueueClient.jpr” and “TesterQueueClient.jpr ” as shown in the next figure.
3- By following the steps described as comments in the file, you get the final code of partner service. In fact, you will change in code the word Partner by the name of you partner service.
Be Careful: the name should be the same of specification.
4- In the line 26 of “Partner.java”, you are taken to set the appropriate URL of the partner service. SO, How to get it?
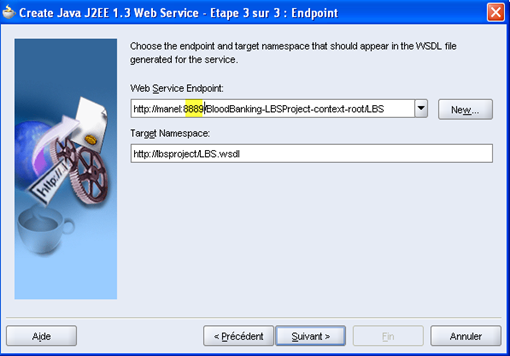
a- Double click on the service LBS.
b- Expand “Endpoint” and copy the “Web Service Endpoint”. That’s to appropriate URL of the partner service.

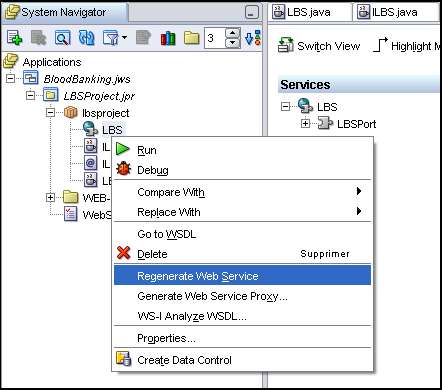
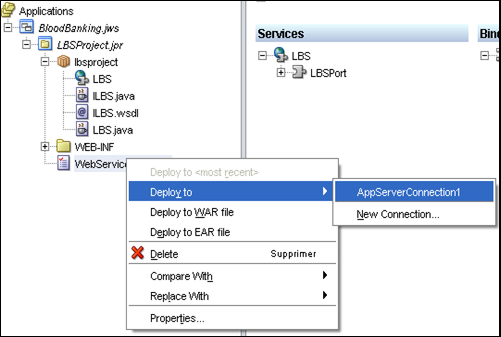
5- Regenerate and deploy the service LBS.
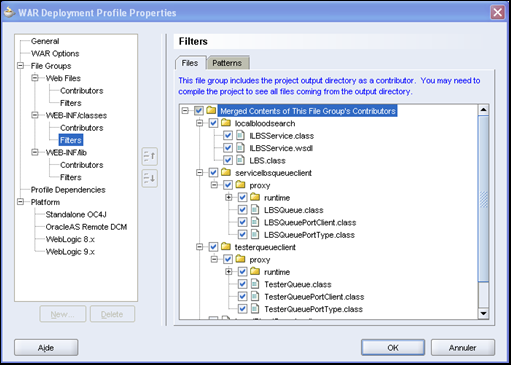
6- Notice: Sometimes, an error “500 Internal” appears when we invoke the partner service. This is due to some missing classes in deployment. To resolve this problem For this, right double click on “WebServices.Deploy” on “LBSProject”, go “WEB-INF/classes”, select “Filters” and check all classes as shown in the next figure.
2- Right click on “BPELInvoker”, select “All Technologies”, expand “Business Tier” select “Web Services” and select “Web Service Proxy” click OK.
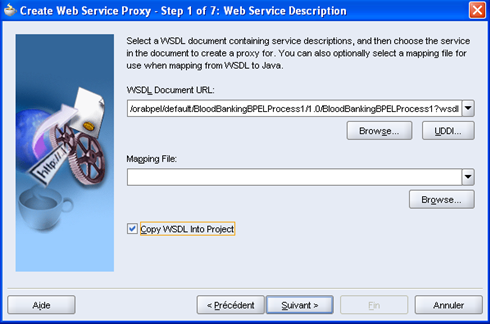
3- Give the WSDL URL points to our Business Process to be executed. Check on Copy WSDL into Project.
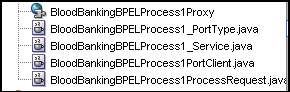
7- Finally, if one clicks Finish, the Proxy code will be Auto Generated Successfully.

- “BloodBankingBPELProcess1_PortClient.java”,
- “BloodBankingBPELProcess1ProcessRequest.java”,
- “bpelinvoker.proxy.BloodBankingBPELProcess1PortClient”: it is used to invoke “BloodBankingBPELProcess1”;
- “lbsqueueclient.proxy.LBSQueuePortClient”: it is used to invoke “LBSQueue”;
- “lboqueueclient.proxy.LBOQueuePortClient”: it is used to invoke “LBOQueue”;
- “ucqueueclient.proxy.UCQueuePortClient”: it is used to invoke “UCQueue”;
- “hmqueueclient.proxy.HMQueuePortClient” : it is used to invoke “HMQueue”.
So, we will create in the tester directory five classes to call these proxies:
- “BPELInvoker.java” : it is used to call “bpelinvoker.proxy.BloodBankingBPELProcess1PortClient”. You can download “BPELInvoker.java” from here.
- “SendToPartnerLBS.java”: it is used to send to the partner service LBS the output generated by WSCCT core (look at step 6 in Steps of online conformance testing). You can download “SendToPartnerLBS.java” from here.
- “SendToPartnerLBO.java”: it is used to send to the partner service LBO the output generated by WSCCT core. You can download “SendToPartnerLBO.java” from here.
- “SendToPartnerUC.java”: it is used to send to the partner service UC the output generated by WSCCT core. You can download “SendToPartnerUC.java” from here.
- “SendToPartnerHM.java”: it is used to send to the partner service HM the output generated by WSCCT core. You can download “SendToPartnerHM.java” from here.
Notice: We will make an agreement for the names of created classes:
- The class that invokes the BPEL has always the name : “BPELInvoker”;
- The class that calls the proxy of partner service’s queue has the name “SendToPartner”+”PartnerServiceName”. Let “A” be the name of a partner service, the name of the class that calls the proxy of the queue of partner service “A” is “SendToPartnerA”.
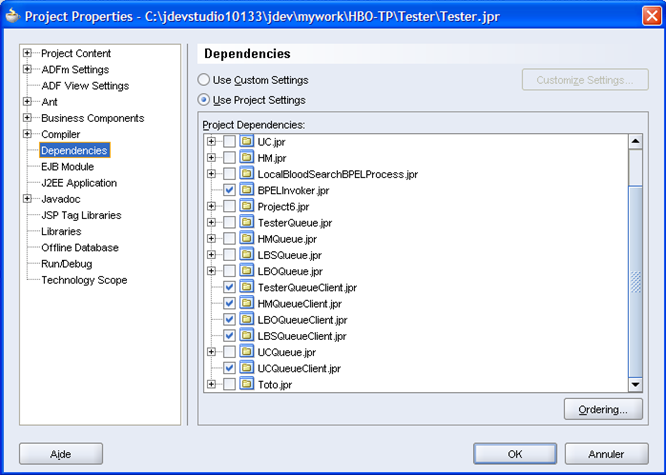
Notice: In order to use the essential classes of proxies, these classes should be available at “Tester” project . For this, right click on “Tester”, go to project properties, select dependencies and check on “LBSQueueClient.jpr”, “LBOQueueClient.jpr”, “HMQueueClient.jpr”, “UCQueueClient.jpr”, “BPELInvoker.jpr”, and “TesterQueueClient.jpr” as shown in the next figure.
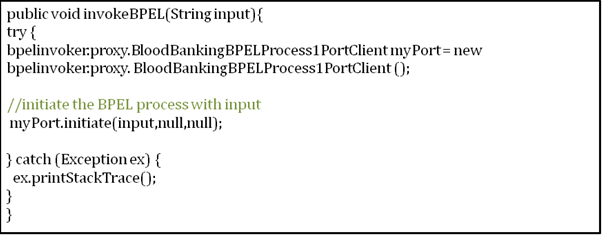
- For the class of BPEL invocation:
1- Create the class BPELInvoker.java.
2- Copy and paste the code of “BPELInvoker.java”.
3- Change the name of BPEL’s proxy by your own created BPEL’s proxy. (Modifications to do are putted as comments in “BPELInvoker.java”).
For the classes of Partner Proxies:
1- Create the class “sendToPartner” (choose the name as described in the 1st notice);
2- Copy and paste the code “SendToPartnerLBS.java”;
3- Change the proxy by your own created proxy. (Modifications to do are putted as comments in “SendToPartnerLBS.java”).
Now, everything is ready! So, let’s start the test.
Top of Page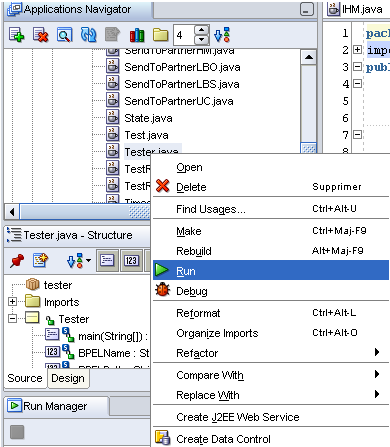
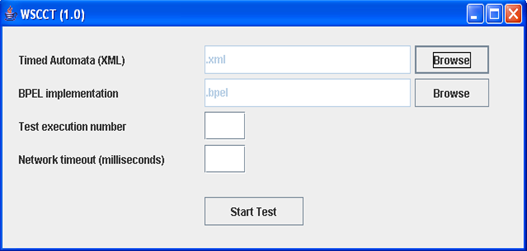
Test inputs are:
1- a xml file that describes Timed Automata specifying BPEL composition under test,
2- a bpel file that implements the composition under test,
3- test execution number,
4- network timeout(in milliseconds).
Once required inputs are submitted and test is started, WSCCT user can follow at run-time the test execution running as shown in the next figure.

Example of test report
In this section, we will present an example of test report generated while testing HBO-TP BPELProcess.
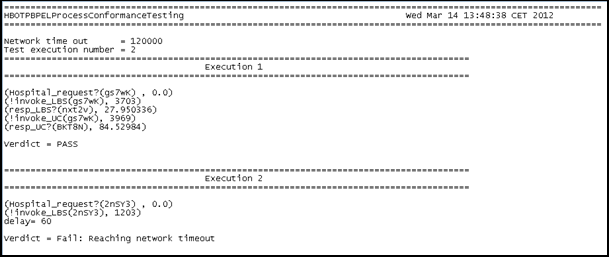
For the second execution, WSCCT core system takes the second path. Then, it generates a random data to invoke the BPEL (2nSY3). The BPEL uses this data to invoke the partner “Local blood search” (LBS) service and waits for its answer. At time 1.203, “Local blood Search” informs WSCCT core that it has been invoked. WSCCT core verifies that “LBS” is the right service to invoke and checks the type of the input received from the BPEL. Then, respecting the model (TA), the test system waits for a period of 60 s (delay = 60) and does not answer “LBS” which remains waiting the response of the tester to send it to the BPEL process. After the passage of the 60s, the BPEL process signals a "timeout" since he has received nothing from “LBS”. The WSCCT passes to the next state and still waiting and information from an invoked partner service. Finally, a test report with FAIL verdict caused by reaching network timeout. In fact, the tester did not observe the “Hospital maintenance” (HM) service invocation (!invoke_HM) in a delay inferior than 120 seconds. In other words, it did not receive a message from (HM) within this network timeout.